Installing Docker
This post has been superseded by https://phwl.org/2022/installing-docker-2022-version/.
Here are installation instructions for installing Docker and running Modelsim for my ELEC3608 Computer Architecture course.
1. Installation
- (Windows)
- Install the VcXsrv X windows server https://sourceforge.net/projects/vcxsrv/
- (Windows 10 all versions) Use instructions at https://docs.docker.com/docker-for-windows/install/ to install Stable version of Docker Desktop for Windows (follow them carefully).
- Run Docker Desktop by double-clicking the icon on the desktop
- (MacOS)
- Download and install stable version from https://docs.docker.com/docker-for-mac/install/ (or https://docs.docker.com/docker-for-mac/apple-silicon/ for the M1 mac in which case you need to add
--platform linux/amd64to the command lines below) - Run Docker Desktop by clicking the Docker icon
- Download and install stable version from https://docs.docker.com/docker-for-mac/install/ (or https://docs.docker.com/docker-for-mac/apple-silicon/ for the M1 mac in which case you need to add
2 Testing
2.1 Hello world
To test basic Docker functionality, type docker run hello-world in the command window. Your output should be something like:
Hello from Docker!
This message shows that your installation appears to be working correctly.

To generate this message, Docker took the following steps:
 1. The Docker client contacted the Docker daemon.
 2. The Docker daemon pulled the "hello-world" image from the Docker Hub.
    (amd64)
 3. The Docker daemon created a new container from that image which runs the
    executable that produces the output you are currently reading.
 4. The Docker daemon streamed that output to the Docker client, which sent it
    to your terminal.

To try something more ambitious, you can run an Ubuntu container with:
 $ docker run -it ubuntu bash

Share images, automate workflows, and more with a free Docker ID:
 https://hub.docker.com/

For more examples and ideas, visit:
 https://docs.docker.com/get-started/
2.2 X Server
We need to use the X Server to display graphical output. This tests X Windows basic functionality.
- (Windows setup)
- Run XLaunch and configure “Multiple Windows” and “Start no client”
- Open a Windows Powershell window
- Type
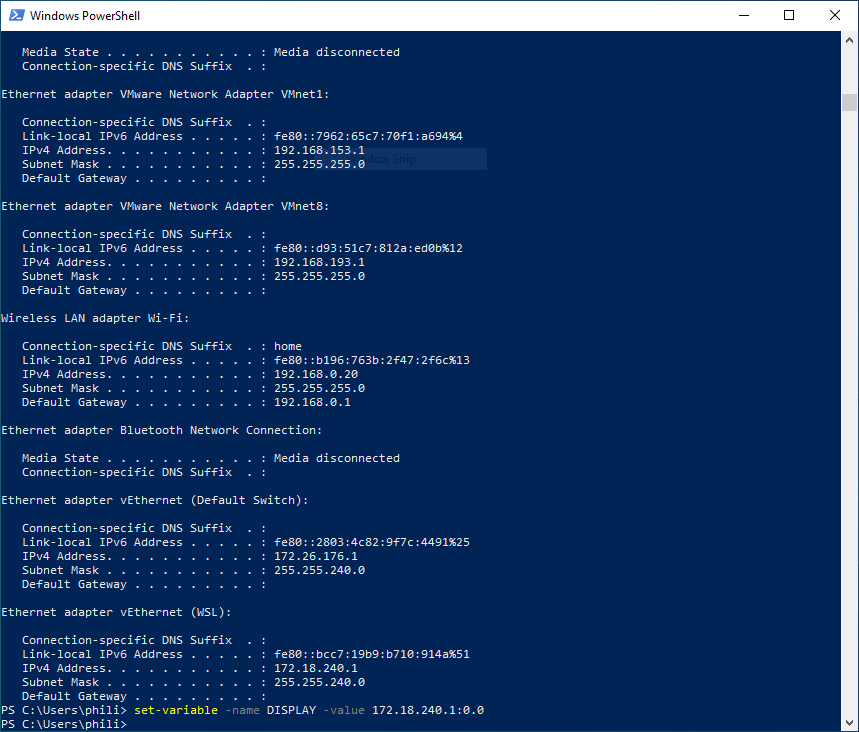
ipconfig. Note the IPv4 Address for the Ethernet Adapter vEthernet (WSL). Say it is aaa.bb.ccc.d (on my machine it was 172.18.240.1) - Type
set-variable -name DISPLAY -value aaa.bb.ccc.d:0.0(set-variable -name DISPLAY -value 172.18.240.1:0.0on my machine)
- (x86 MacOS X setup)
- Install homebrew (see
https://brew.sh/) - Use homebrew to install xquartz ```brew install –cask xquartz’’’
- Run the
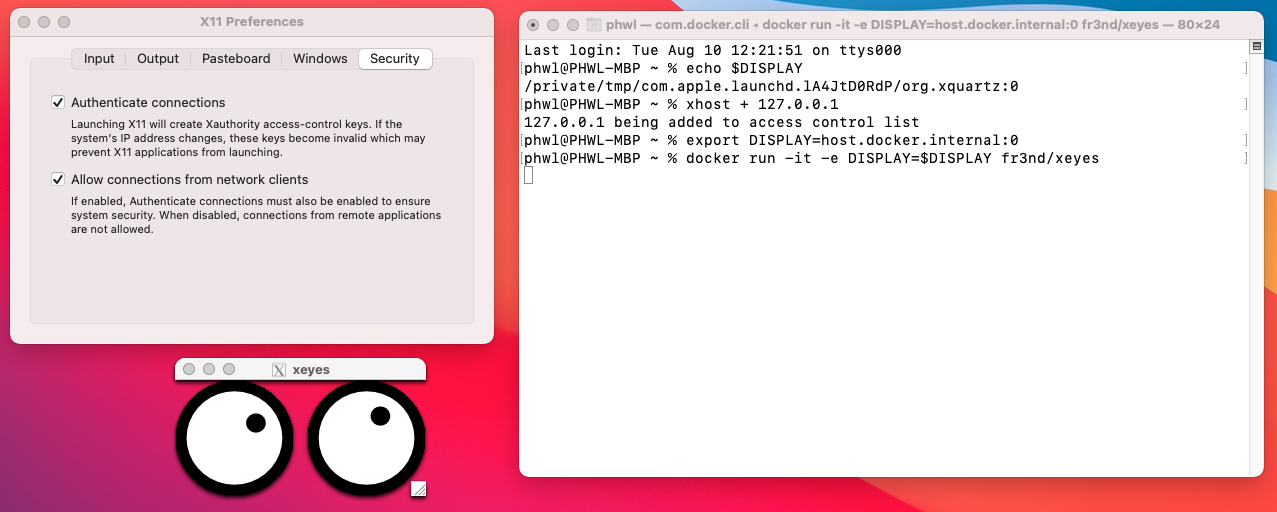
XquartzX Server program by clicking on the icon, an xterm window should appear - Set “Allow connections from network clients” in XQuartz -> Preferences
- In the xterm window type
$ xhost + 127.0.0.1
127.0.0.1 being added to access control list
$ export DISPLAY=host.docker.internal:0
$ docker run -it -e DISPLAY=$DISPLAY fr3nd/xeyes
- Install homebrew (see
If you get an error with the xhost command, try a reboot. You should see the window below and the eyes should move with your mouse.
- (M1 MacOS X setup)
The commands are the same as for x86 MacOS except you add
--platform linux/amd64, e.g.$ docker run --platform linux/amd64 -it -e DISPLAY=$DISPLAY fr3nd/xeyes
2.3 Modelsim
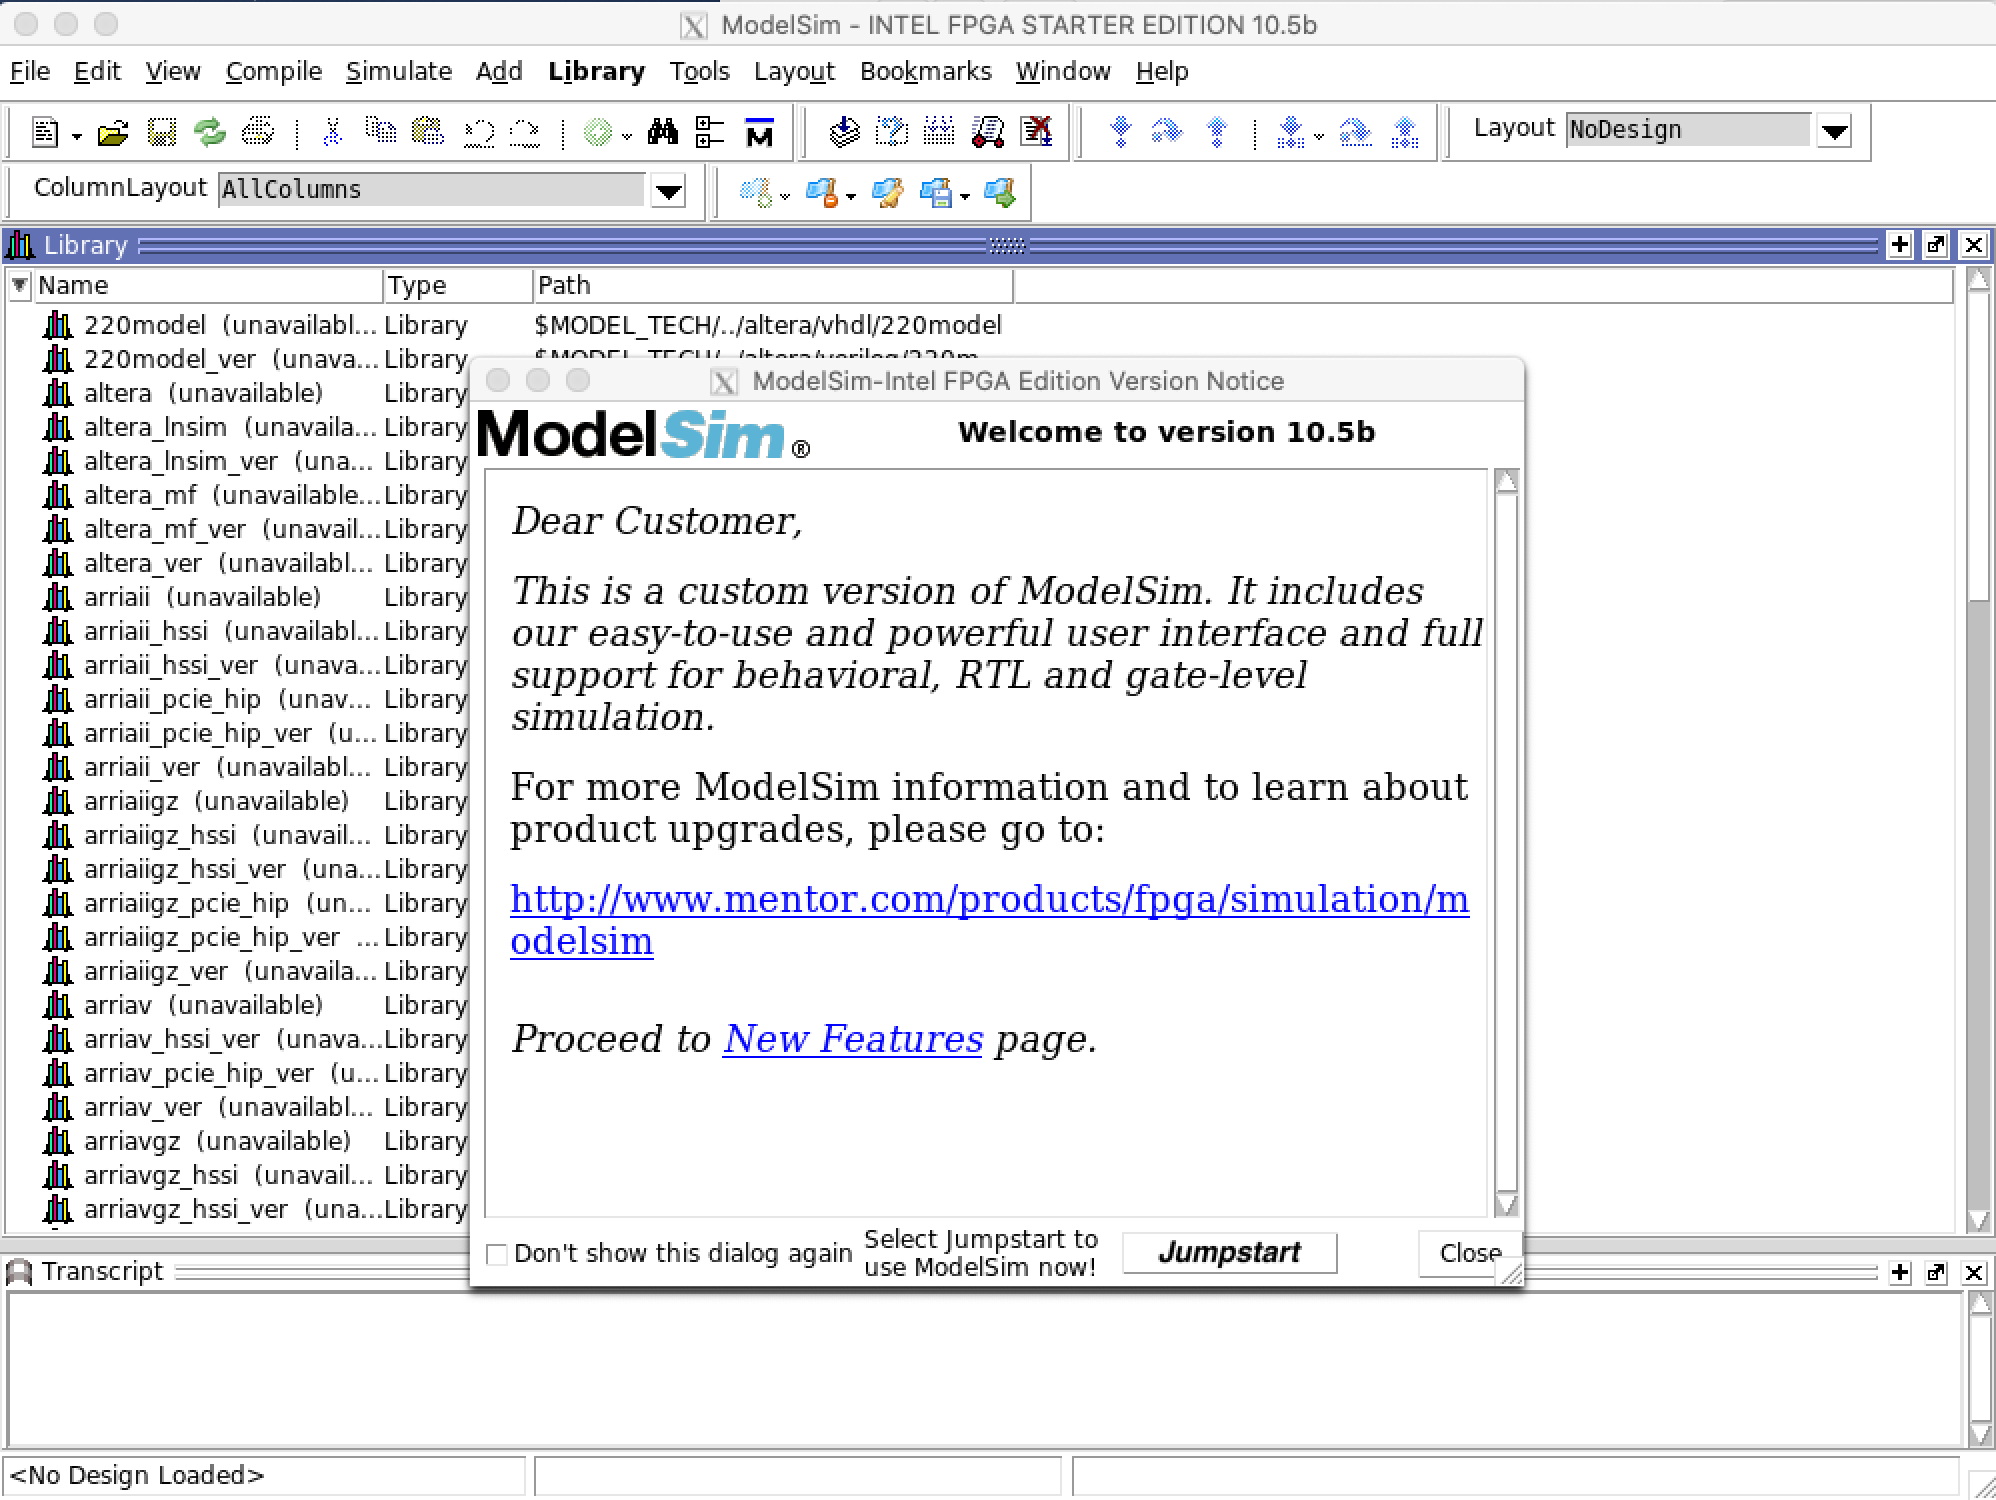
Finally, this tests the Docker image for Modelsim (the executable is called
vsim). Make sure you have set up your X Server and can execute the
previous Xeyes example.
- (Windows) If your home directory is “C:\Users\XX YY”, you should now be able to run vsim
docker run -it -e DISPLAY=$DISPLAY -v C:\Users\"XX YY":/mnt phwl/elec3608-vsim:latest vsim(note the position of the quotes). - (MacOS) You should now be able to run vsim
docker run -it -e DISPLAY=$DISPLAY -v $HOME:/mnt phwl/elec3608-vsim:latest vsim.
If everything works, the Modelsim window should appear.
Within Docker, the directory on your local home directory will be mapped
to /mnt. Use this to access your files and store your outputs.
3 Troubleshooting
- Update your operating system to the latest version. My Windows 10 Pro installation was on Version 2004 (OS Build 19041.388) available https://www.microsoft.com/en-us/software-download/windows10ISO.
- Check you have virtualization enabled in your BIOS
- Reboot the computer and open the system’s BIOS menu. This can usually be done by pressing the delete key, the F1 key or Alt and F4 keys depending on the system.
- Enabling the virtualization extensions in BIOS. Open the Processor submenu The processor settings menu may be hidden in the Chipset, Advanced CPU Configuration or Northbridge. Enable Intel Virtualization Technology (also known as Intel VT-x). AMD-V extensions cannot be disabled in the BIOS and should already be enabled. The virtualization extensions may be labeled Virtualization Extensions, Vanderpool or various other names depending on the OEM and system BIOS. Enable Intel VT-d or AMD IOMMU, if the options are available. Intel VT-d and AMD IOMMU are used for PCI device assignment.
- Select Save & Exit.
- If you are using Windows Home, you might like to update to the (more powerful) Windows 10 Education, Version 1809, available here. After installing, update to the latest version.
- Niansong Zhang compiled this list at the NOVA’19 workshop
-
I have been trying to install quartus prime on docker on windows however when i run the following command docker run -it -e DISPLAY=$DISPLAY -v C:\Users"XX YY”:/mnt phwl/elec3608-vsim:latest vsim, “XX XY” i had as my current directory, I got the following error: Error: Can’t open display: 172.18.240.1:0.0. I have been trying to fix it but to no avail. Do you know of a way to fix this?
To solve the problem, you need to check two points:
- the set-variable DISPLAY instruction. Use “$DISPLAY” to see whether your display address is correct.
- check the X server. Try some small example in Xserver to check whether it can run properly(after it runs, right click the icon and there is some tony example such as calculator), and if these example can work but docker still launched, restart the Xserver software, I got the docker run through restarting Xserver.
- Problem with not being able to detach and resize Modelsim windows under Linux: Seems it was related to Xwayland on my end. I tried a couple of different X server implementations, xpra and xephyr and all was well. I found this bash script quite helpful. https://github.com/mviereck/x11docker. The script starts the container in a fresh new X session, without the usual permission hassles.
4 Links
- The Docker image is derived from one provided by Prof Nachiket Kapre (Waterloo). If you want to create your own variant, the scripts used to create it are available here.
- Notes on Docker support under Windows Home with WSL 2 https://www.docker.com/blog/docker-desktop-for-windows-home-is-here/ (from Dr Peter Jones)
- Notes on WSL 2 and Hyper-V https://devblogs.microsoft.com/commandline/wsl-2-post-build-faq/ (from Dr Peter Jones)